Monday, July 4, 2022

More Garden Elements

 These are just a couple more pieces I made for the scene in the garden at the end of Chapter 4. Both of these could easily have been made in Blender, but I'm trying to subtly interweave digital and physical pieces.  As a side note, Poison Fruit has a lot of gardens, since it's set in Renaissance (sort of) Italy.  Having already shown Isabella's garden in Chapter 2 (based on the historical Isabella's actual garden) and  Giovanna's courtyard garden in Chapter 3 (based on the outside dining area of a modern restaurant), I needed to try and differentiate the Contessa's garden.  Hopefully they are different enough...and Poison Fruity enough.  More gardens to come!

This is the corner of the stage that the musicians are standing on, under the pavilion. It's just a box tacked together with brads, and I'm sure I'll repaint it later and use it for something else.


And here is the wrought iron gate, which is visible in several scenes.  This piece ended up being a little more involved than I had expected.  I used a razor knife and a bench chisel to cut it out of the cardboard from the back of a legal pad.  So many little rectangles!  I think it came out pretty well, though.


Incidentally, the black around the edges is from using an APS-C lens with my full frame camera and not bothering to adjust the crop factor.  There's no point when most of the image will be cropped anyway.

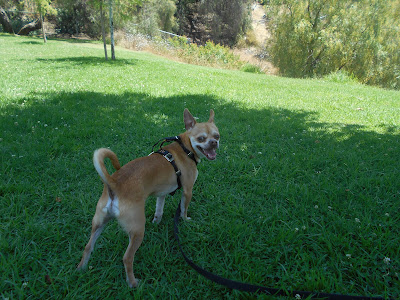
Another thing that the garden has a lot of is grass.  Of course I have lots of grass textures on my hard drive, but I wanted something more irregular.  After all, they haven't invented mowers yet in the Poison Fruit world.  I went to walked to the local park and took pictures that I could slop together in GIMP to get the effect I wanted.  Here is my QA supervisor, making sure I did the job right.


Saturday, July 2, 2022

Stucco Terrain

 This is a piece of landscape that will figure heavily in one of the Chapter Five scenes, but I also shot a corner of it as part of a the background of the party in Chapter 4

I made it out of stuccoーtop coat mix for the rougher parts and base coat mix for the smoother sections.  Stucco is not a traditional model making material, I live in California so I already had the tools and partial bags of mix.  Around here everything is covered in stucco.  This picture is from just after I put on the primer.


And this picture is shows an intermediate stage where the model isn't done, but the piece of it I need for Chapter 4 is good enough.  The rail fence is will be taken off later, since I won't need it in the next chapter.  It's only held on with some dabs of hot glue.  The brown is old house paint I had, and the grays on the rocks are airbrushed craft acrylics.  


And here, somewhat anticlimactically, is one of the pictures I used making my background matte.


Two points which I should mention (nerd stuff follows): 1) Shooting models in general are less detailed than other sorts of models.  They actually look worse with too much detail.  2) The scale on this model gets smaller as you go back.  This is because I'm planning to force the perspective. 3) The background is out of focus.  Physical lenses like the 50mm prime I'm using here (or the human eye) have a limited depth of field. Blender, on the other hand, has an infinite DOF by default.  I can set the f-stop in Blender to mimic that effect, but I usually don't.  Most of the panels that seem to have an out-of focus background have it added procedurally at composite time.  The problem comes when I match the focal lengths between a photograph and a render and have different DOF's.   In this particular case it isn't a problem because I like the mountain to be a little blurry.  If I needed to simulate the "infinite DOF" of Blender, though, I would need to take multiple photographs at different focus points, then composite them together. 

There's a lot to think about when you work in meat-space, but I think it's worth it for the look that physical objects give my panels. 


Introduction to the C-roll

Now that I'm doing more physical models for Poison Fruit I thought I would share some pictures.  It seems that, while many people are bored when I talk about what I do in Blender and GIMP, they get interested as soon as I talk about what I do in the shop.  Some of my animator friends talk about cyber-space vs meat-space.  This blog will be mostly about the meat-space side.  

I call it the C-roll because when you're shooting a live action movie you traditionally label the rolls of film according to weather they are coverage of the main action (A-roll), other shots that will be useful in editing--extra views, atmospheric things, background plates, etc (B-roll), and "behind the scenes" footage which will usually be used for the DVD bonus features (or whatever equivalent that kids are using these days) or, sometimes, and stand-alone documentary.  Actually, a C-roll is usually shot in video, even on film movies, for convenience and because film is expensive.

And, finally, don't expect this blog to be fancy.  Poison Fruit is an extremely labor intensive project, so I probably won't have time to do more than dump images on here with a brief description of what's going on. 

More Garden Elements

 These are just a couple more pieces I made for the scene in the garden at the end of Chapter 4 . Both of these could easily have been made ...